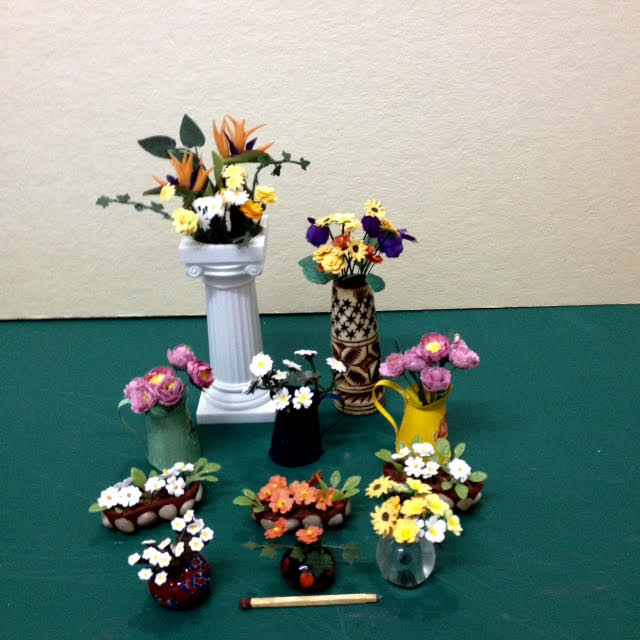
Drora's surprise giveaway

Drora's surprise giveaway
4 Dec.2019

Friday, September 30, 2016

Flowes in memory of one of the greatest figures in the recent history of our nation SHIMON PERES

Dear readers,

Today was a sad day.  We said goodbye to Shimon Peres, a  great man of vision, a man of peace, a former president and prime-minister, winner of the Nobel Prize for Peace.

In tribute to his memory here are  paper flowers I  created, most of them this week.


Monday next week we celebrate our New Year.  There will be two more holidays in October.  I
hope the weather will be fine and people will be able to go out and have fun.

I wish you all a wonderful weekend and blessings.

Friday, September 23, 2016

Stone House Tutorial

Hello dear readers,

As promised, here is the tutorial.  I chose it as a Christmas gift to you, because these kind of stone
walled houses are what you see in Bethlehem, Nazareth, Jerusalem and other ancient cities in Israel. If you wish, there is enough time to create a Nativity scene using this technique.

First of all, please watch again very carefully the video here. It shows you exactly how to carve the styrofoam.

The sizes are in centimeters.

Materials:

Styrofoam trays 0.5 cm thick.  Use only the center parts which are completely flat and unmarked.
Color not important. (My trays are 23 x 17.5 yielding a workable piece of about 15 x 10 centimeters.)

Tacky glue ( or any quick drying white plastic glue that dries clear).  You can try to glue two spare pieces of foam together to see if it works. My advice is to practice on spare pieces before taking on a project.

Acrylic paints.
Terracotta,  Flesh color and linen or beige.

Mod podge.  I don't have any at hand and will use diluted tacky glue to seal the pieces.


One wooden tongue depressor and one larger craft stick for window and door.

A little piece of brown fimo. Tiny bits of findings for door knob and hinges.

Tools:


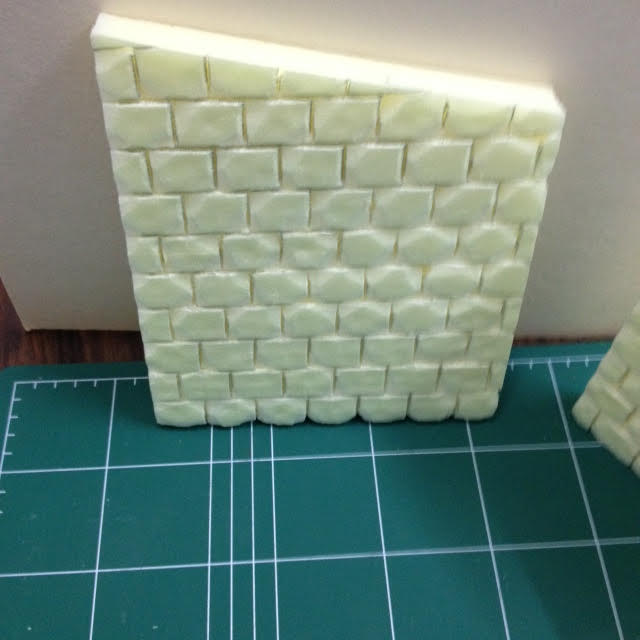
Cut out the center flat part of the tray. I used three.


Trim it to 15 x 10 to make the side walls, 3 cm each and the back 9 cm. Do not cut, you can start carving the three together, following the video tutorial above.


Now you can cut away the side walls from the back and cut out the triangle.


Take the second cut out piece of flat foam to make the front wall and the roof.


This is how to cut the ends of the roof tiles.


The third cut out is for the base. You can make a larger base for outdoor decoration.
This tutorial is for a simple cottage only.  After you acquire the skill you can make different
designed houses.

This is the door, windows and flower box. ( I prepared one more window as a spare) Cut the craft sticks to the desired size.  From the brown fimo you roll out a long snake and place it around the cut pieces.  Bake the door and window (not the foam flower boxes.) The foam will melt away if you bake it.


Paint all the walls the color of your choice and glue them together. First glue the side walls to the back as shown.


Next glue the door and window  to the front piece.


Glue the front to the back and to the base.


Glue on the roof.


To seal the house you'll need to use Mod Podge or diluted white plastic glue.
(One part glue, 2 parts water.)  Looks like like milk.


Paint the house all over with this mixture. Seems a little messy but not to worry if will dry out fine.


The finished house.  I hope this was not too long a tutorial and apologize for my not very eloquent
English.  I'll be happy to answer any questions.


I wish you all a wonderful sunny weekend and blessings.

Saturday, September 17, 2016

Home for a fairy

Hello dear readers,

A warm welcome to all  my new followers!

My attempt at making something out of the styrofoam tray had successful results.  I used three
23 x 17.5 cms trays to make this little house.  I wish I could find larger trays but am very grateful to my generous butcher who gave me the trays for free.  This project is simply a fantastic "trash to treasure" one. The possibilities of creating miniatures with this material are endless.  Fireplaces, gingerbread and other cakes, sand-castles, 1:48" dollhouses, etc. etc.


I added a door knob......


I was thinking about building another house with a step by step tutorial.  It is important to explain about the sealing and finishing touches.  I want to do this tutorial as a Christmas gift from me to all my followers.

I wish you all a lovely weekend and blessings.

Monday, September 12, 2016

Starting to look like stones

Hello dear readers,

I have been curving and shaping the walls.  Have finished the outdoors which already looks like stone walls.  I only have to paint them.

Remember the surfboards I made for my seaside camper? I used styrofoam market food trays to make them.  I thought the trays can also be good to practice on.  I saved the pieces to make a small fairy house for Moon.


Three trays were used to make these parts as only the middle parts of them are completely flat. But they are very good to practice on instead of the expensive polystyrene boards.


Now I'll be able to paint them same color as the walls for the fairy house.  I have plenty of time
to finish this project. Our next meeting is scheduled  for end October.

I wish you all a calm, productive week with nice autumn weather and my blessings.

Friday, September 2, 2016

Polystyrene stones

Dear readers,

It's been over a week and scarcely time for working on the new project.  However I did some research
and made a start.  I'll take you along while I make progress.  This polystyrene staff has lots of possibilities in our mini world.

First of all please watch this wonderful video tutorial from youtube.


It shows a fantastic device for cutting the thickness of the boards.  The board is 2 cms thick which is out of scale. I was pleased to discover that it can be cut down to 0.5 cms.  Now we'll have to ask if it can be cut up to order.  The best material is the one that is very dense (no tiny balls).

These are my walls, already lined.  Hopefully when I finish working on them they will resemble stones.


I dry fitted the walls with sellotape to show you, more or less, what the structure will be.
I don't know yet if it will be a shop or something else.  I'm open to suggestions.

Front (very wobbly)


Back (even more wobbly)


We, the local miniaturists are communicating by WhatsApp.  These are the tools we were required
to bring.


Cake decoration tools


A warm welcome to my new followers. Thank you all, old and new friends, for reading my blog

I wish you all a wonderful weekend, the first one in September 2016.